
Instagram Reels have taken the social media world by storm, offering content creators an opportunity to showcase their creativity in short, engaging videos. If you want your Reels to stand out, professional editing is essential. While many use mobile apps, a desktop video editor like CapCut can provide advanced editing capabilities, giving your content a polished and cinematic look. This guide will explore how to edit Instagram Reels like a pro using CapCut Desktop Video Editor.
Why Choose CapCut Desktop for Instagram Reels?
CapCut is a free and powerful video editing software with advanced features. The desktop version offers several advantages over the mobile app, including:
- Larger screen for precise editing
- Advanced timeline controls
- Higher-quality export options
- More professional transitions, effects, and overlays
- Faster processing and rendering
If you’re serious about creating high-quality Reels, CapCut Desktop is an excellent tool to elevate your content.
Step-by-Step Guide to Editing Instagram Reels in CapCut Desktop
Step 1: Install and Set Up CapCut PC
Before editing, download and install CapCut PC from its official website. Once installed, launch the software and create a new project. Set the aspect ratio to 9:16, the standard format for Instagram Reels.
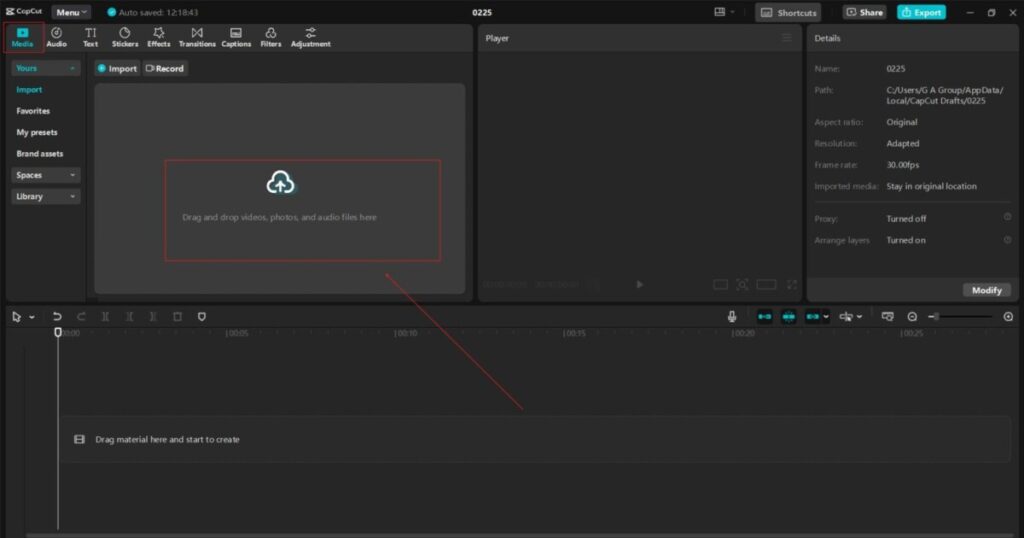
Step 2: Import Your Footage
- Click the “Import” button to add your video clips, images, and audio files, then drag and drop the media files into the timeline.
- Arrange the clips in the order in which you want them to appear in your reel.
Step 3: Trim and Cut Your Clips
- Use the split tool (scissors icon) to cut out unwanted parts. Trim the beginning and end of clips for a smooth start and finish.
- Keep the video engaging by maintaining a fast-paced editing style.
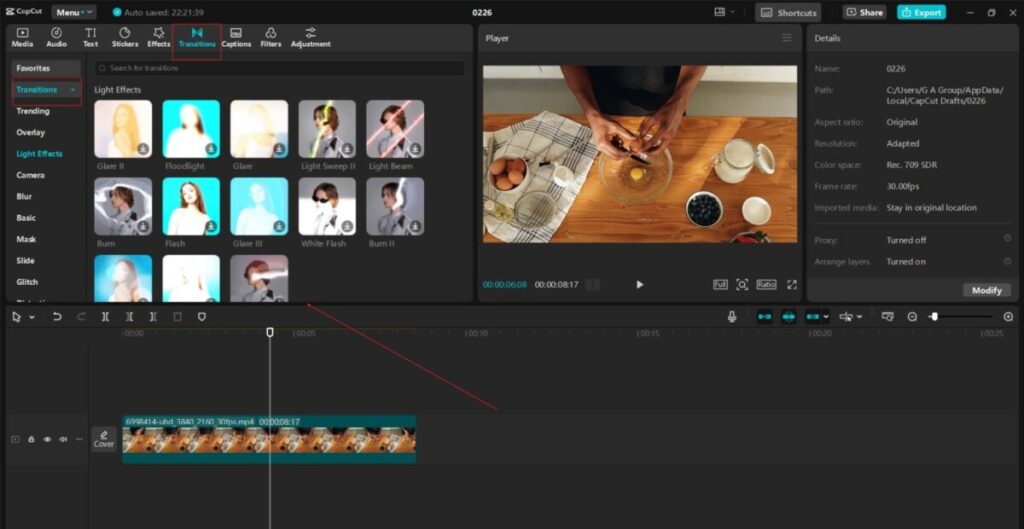
Step 4: Add Transitions and Effects
- Transitions are a great way to enhance your video. The “Transitions” tab can add seamless transitions between clips.
- Experiment with motion blur, zoom-in, or fade effects to smooth transitions.
- Adjust the duration of transitions for a professional look.
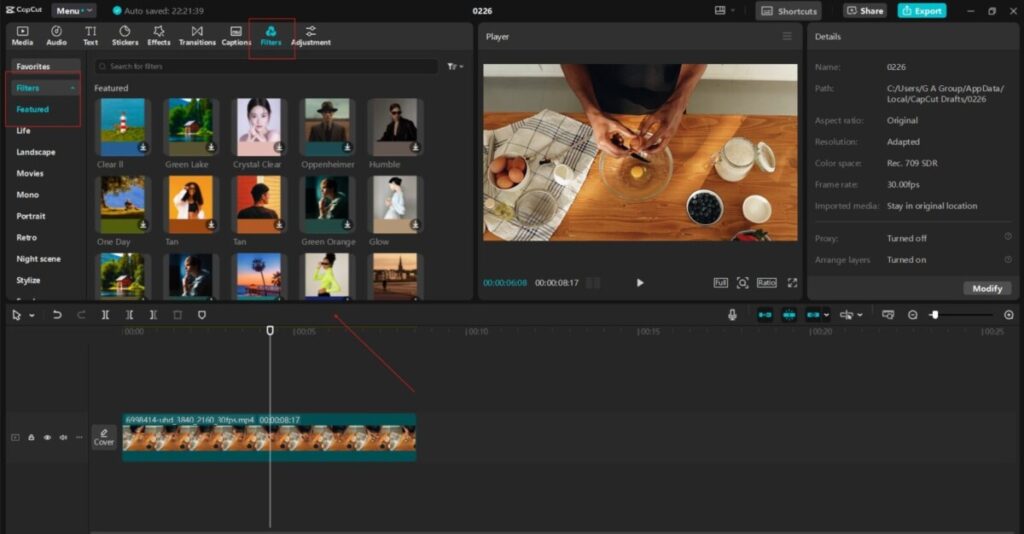
Step 5: Apply Filters and Color Correction
To make your video aesthetically pleasing:
- Use CapCut’s built-in filters to enhance the look of your video.
- Adjust the color correction panel’s brightness, contrast, saturation, and sharpness.
- Maintain a consistent color theme for brand identity.
Step 6: Add Text and Subtitles
- Click on the Text tab to add stylish fonts and captions.
- Use motion graphics or animated text to highlight key points.
- Add auto captions (CapCut has an auto-subtitle feature) to improve accessibility.
Step 7: Incorporate Music and Sound Effects
- Click on the “Audio” tab to import music or choose from CapCut’s library.
- Use beat sync to align your clips with the music rhythm.
- For a dynamic video, add sound effects like whooshes, pops, and camera clicks. The text-to-speech AI feature can also be used to add text to your video.
- You can also click “Text”>”Text to speech” to improve your videos with AI voiceover.

Step 8: Use Keyframe Animations
For advanced editing, use keyframe animations to:
- Create smooth zoom-ins and zoom-outs.
- Add dynamic motion to text and images.
- Make creative panning effects for a cinematic touch.
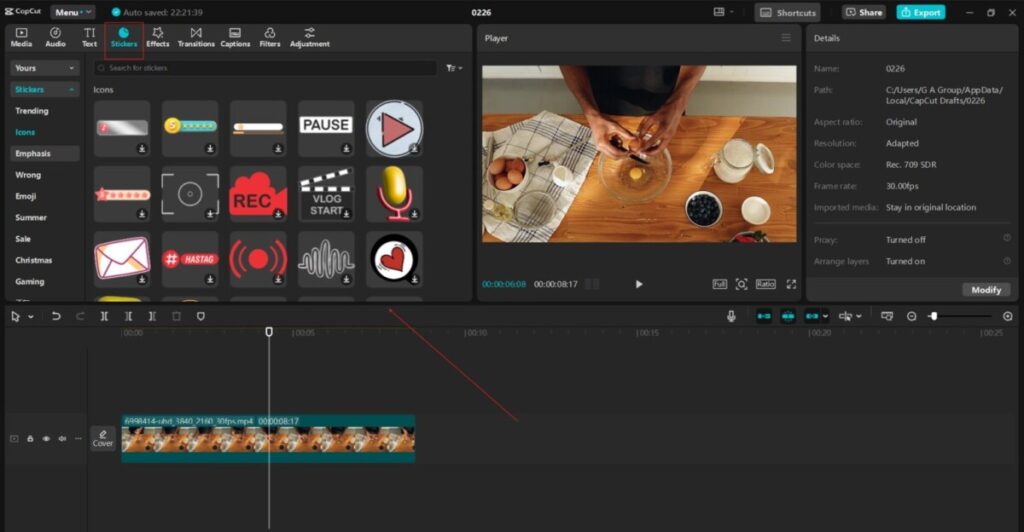
Step 9: Add Overlays and Stickers
Enhance your Reel by:
- Add animated stickers or emojis.
- Using overlays like light leaks or glitch effects.
- Incorporating a brand logo or watermark for personalization.
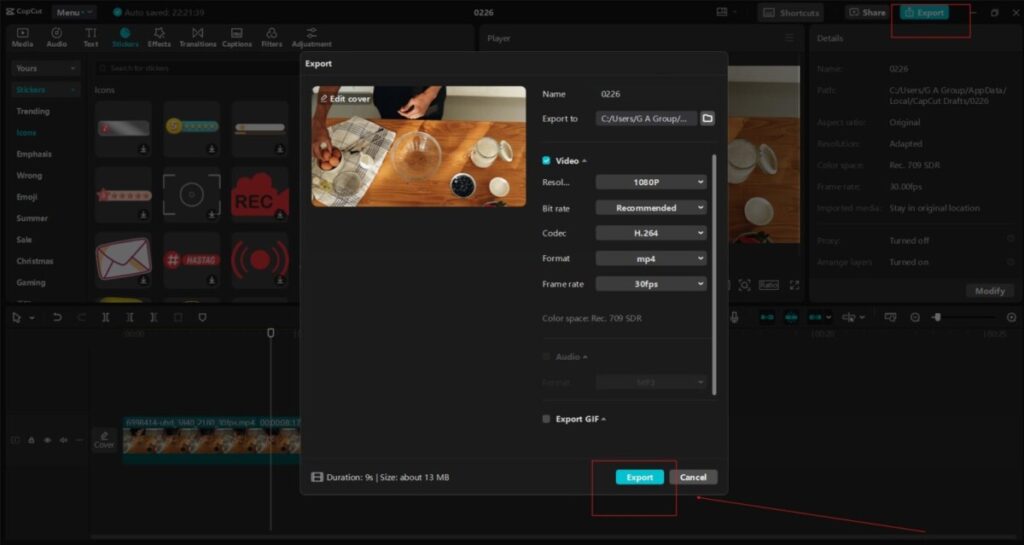
Step 10: Export Your Reel to High Quality
- If all goes well and you are ready to export your Instagram reel, hit the “Export” button and select the best resolution (1080p or 4K).
- Choose the MP4 format for optimal Instagram compatibility.
- Adjust the frame rate to 30FPS or 60FPS for smooth playback.
- Ensure the file size is under 100MB for Instagram upload efficiency.
Pro Tips for Creating Viral Instagram Reels
3.Hook Your Audience in the First 3 Seconds
The Instagram algorithm favors videos that retain viewers. Start your Reel with an eye-catching visual or question to grab attention instantly.
4. Keep It Short and Engaging
While Instagram allows up to 90-second Reels, shorter videos (7-15 seconds) tend to perform better. Keep your content concise and impactful.
5. Use Trending Sounds and Music
Leverage Instagram’s trending audio to increase reach. CapCut allows you to extract and sync sounds quickly.
6. Maintain a Consistent Aesthetic
Use similar color grading, fonts, and effects across all your Reels to create a recognizable brand identity.
7. Add Text Strategically
Since many users watch Reels without sound, add subtitles or bold text to convey your message effectively.
8. Experiment with Different Styles
Try different editing techniques like jump cuts, fast cuts, slow motion, and speed ramps to keep your videos fresh.
9. Optimize for Instagram’s Algorithm
- Post consistently (at least 3-5 times a week).
- Engage with comments and DMs to boost visibility.
- Use relevant hashtags and location tags.
Conclusion
Editing Instagram Reels like a pro requires creativity, consistency, and the right tools. CapCut Desktop Video Editor offers powerful features that allow you to craft high-quality, engaging Reels effortlessly. By following these steps and incorporating pro editing techniques, you’ll be on your way to creating viral content that stands out in the Instagram feed.
Now it’s your turn! Download CapCut Desktop Video Editor, start editing, and let your creativity shine.