
Wondering how to install Clawdbot? Thought so too.
It’s hard to ignore how much of an uproar this bot has caused on the AI streets lately.
But before we get into the step-by-step process of installing Clawdbot, let me clear something up.
This AI assistant has gone through a bit of an identity crisis. It started as Clawdbot, then briefly became Moltbot (after Anthropic wasn’t too happy about the “Clawd” name sounding like “Claude”), and now it’s officially called OpenClaw.
Throughout this article, you’ll see me use these names interchangeably because, honestly, most people still call it Clawdbot. Whatever you call it, it’s the same powerful tool.
So, how do you install Clawdbot?
Let’s get right into it!
How To Install Clawdbot Step-by-Step
What You’ll Need Before Starting
Hardware Option 1: Use AWS Free Tier (Recommended for Beginners)
- An AWS account (free tier gives you 12 months free)
- A credit card (they’ll charge $1 and refund it for verification)
- A web browser
- Your phone (for connecting messaging apps)
Hardware Option 2: Use Your Own Computer
- Any computer with 2GB of RAM minimum (8GB is better)
- Internet connection that stays on
- Ability to keep it running 24/7
Software Requirements
The installation script handles most of this automatically:
- Node.js version 22 or higher (installer sets this up)
- An Anthropic account (for Claude API access)
- A messaging app: Slack, Telegram, WhatsApp, or Discord
- Basic comfort with typing commands (you can do this!)
Important Security Warning Though
It’s important to note that you’re giving an AI access to your computer. That’s powerful but also risky. Here’s what you need to know:
- Run Clawdbot on a dedicated machine or VPS, not your main computer
- Don’t give it access to sensitive files right away
- Consider using a separate phone number for WhatsApp
- Use a fresh email account instead of your personal one
- Think of it like hiring a new contractor, don’t give full access on day one
Method 1: Installing Clawdbot on AWS (The Easy, Free Way)
This is the path most people take. It’s straightforward, costs nothing for the first year, and your bot stays online even when your computer is off.
Step 1: Create Your AWS Account
Head over to aws.amazon.com and sign up for their free tier.
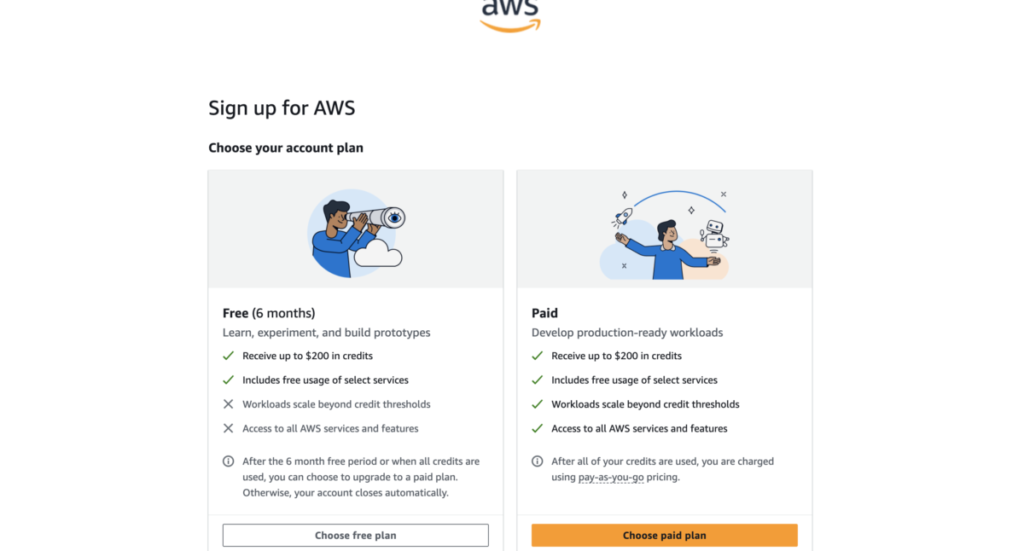
Here’s what happens:
- Click “Create an AWS Account”
- Enter your email and create a password
- Provide your billing information (they’ll charge $1 and immediately refund it, just verification)
- Choose the Basic Support – Free plan
The whole signup takes maybe 5 minutes. Once you’re in, set up billing alerts immediately so you never get surprised charges.
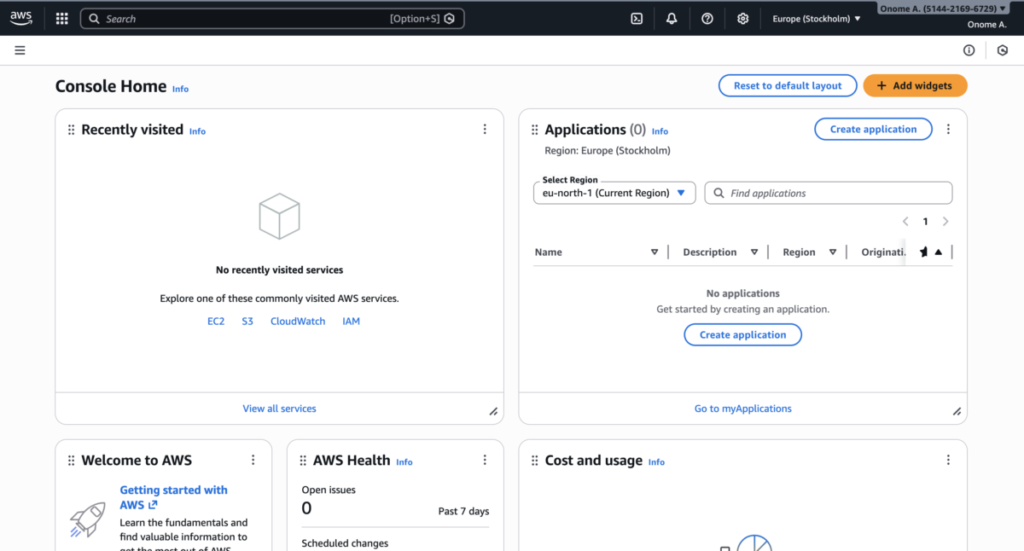
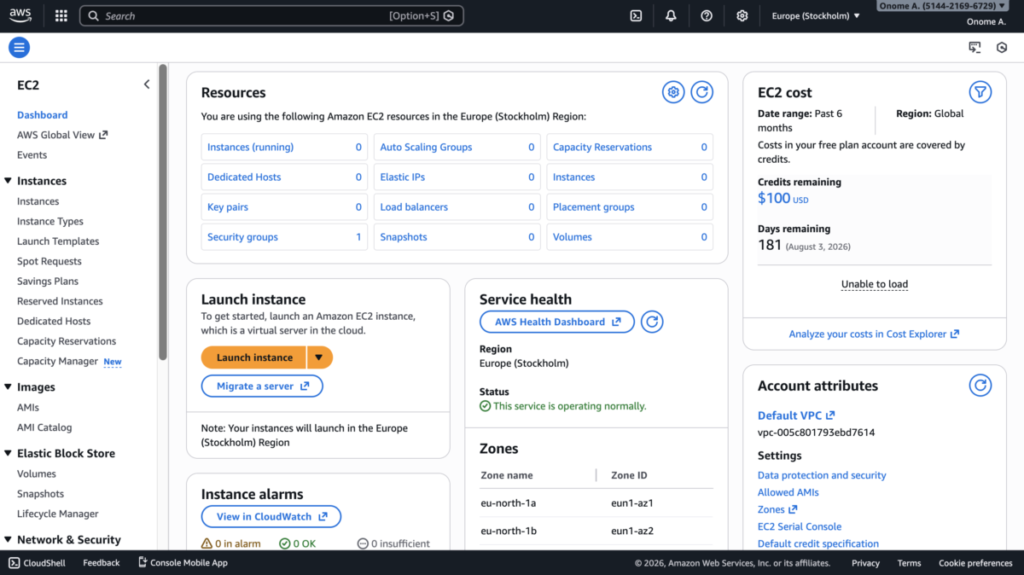
Step 2: Launch Your EC2 Instance (Your Virtual Server)
Once you’re in, click on EC2!
Then click the big orange “Launch Instance” button
Under “Names and tags”, give your instance a name. Something like “Clawdbot” works.
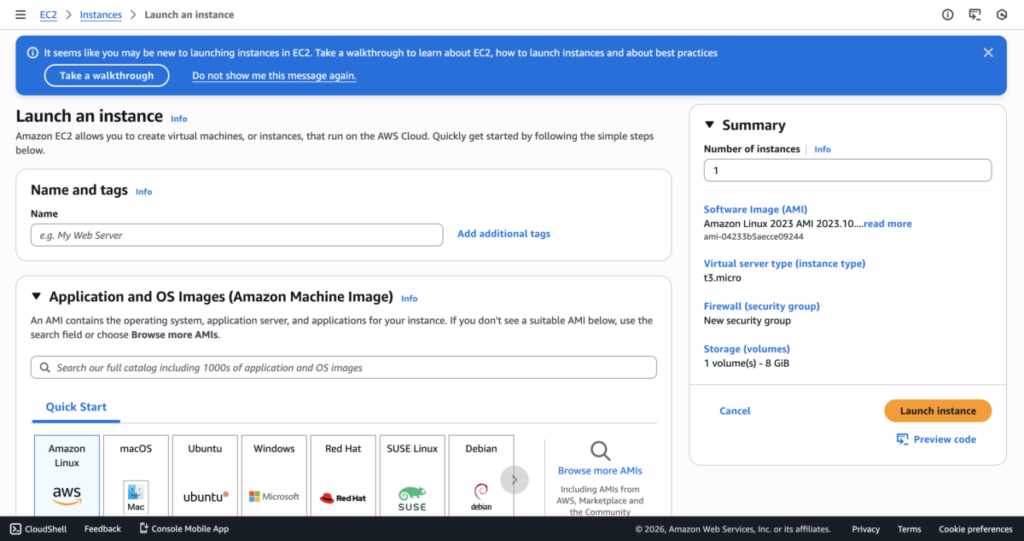
Step 3: Choose Your Operating System and Size
Under “Application and OS Images,” select Ubuntu
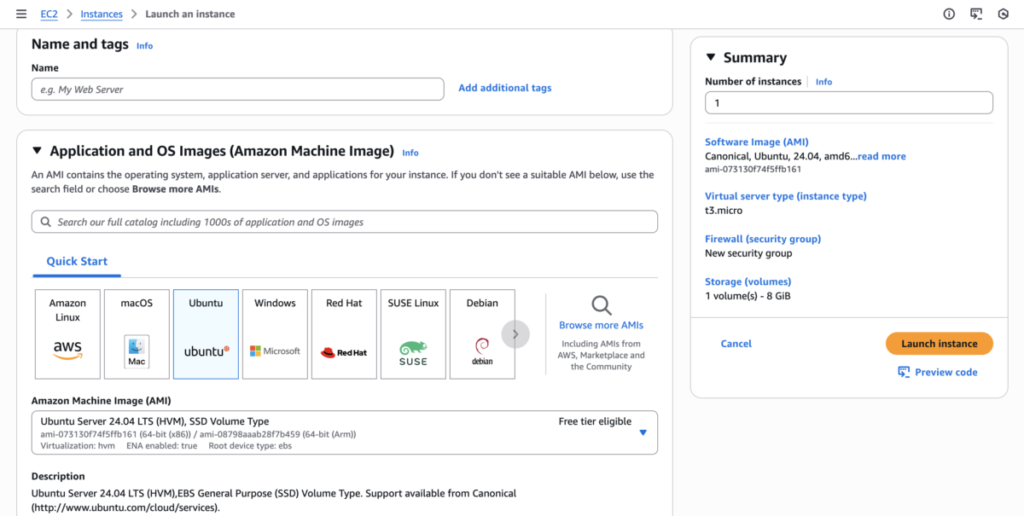
(Keep all the default settings. Don’t change anything else here)
Then, scroll down to Instance type..
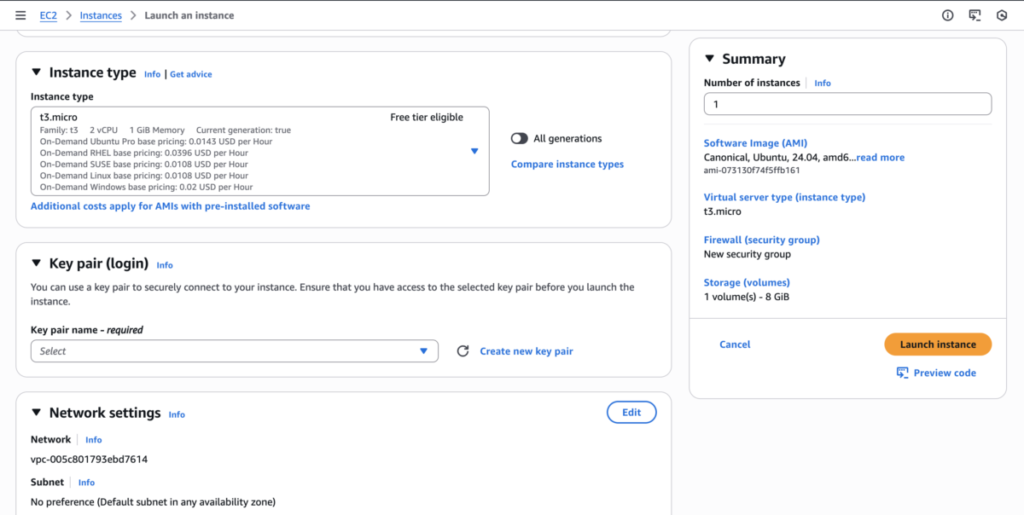
Click the dropdown arrow next to “Instance type”
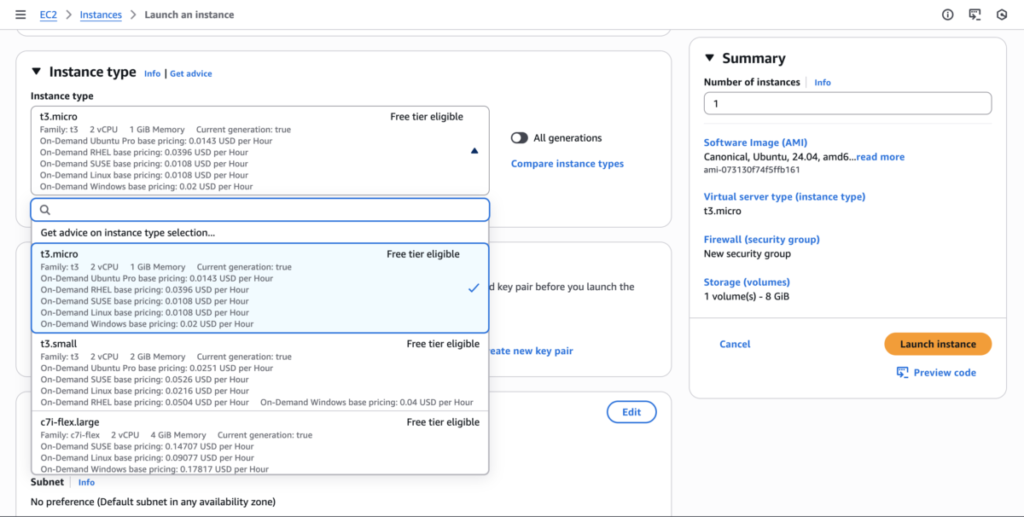
In the search box, type “free” to filter only free tier options
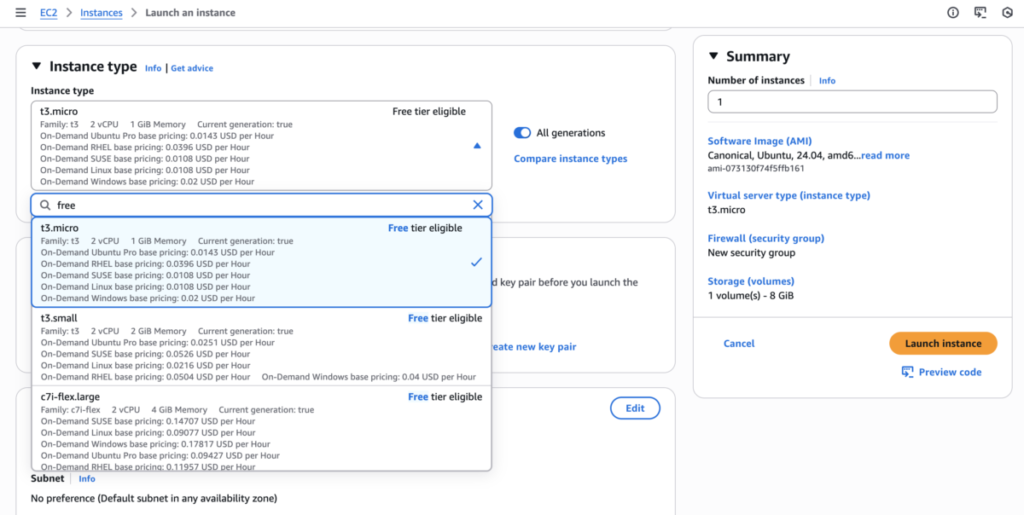
You’ll see options with 1GB, 2GB, 4GB, and 8GB memory
Select the one with 8GB memory (this gives you enough room to work)
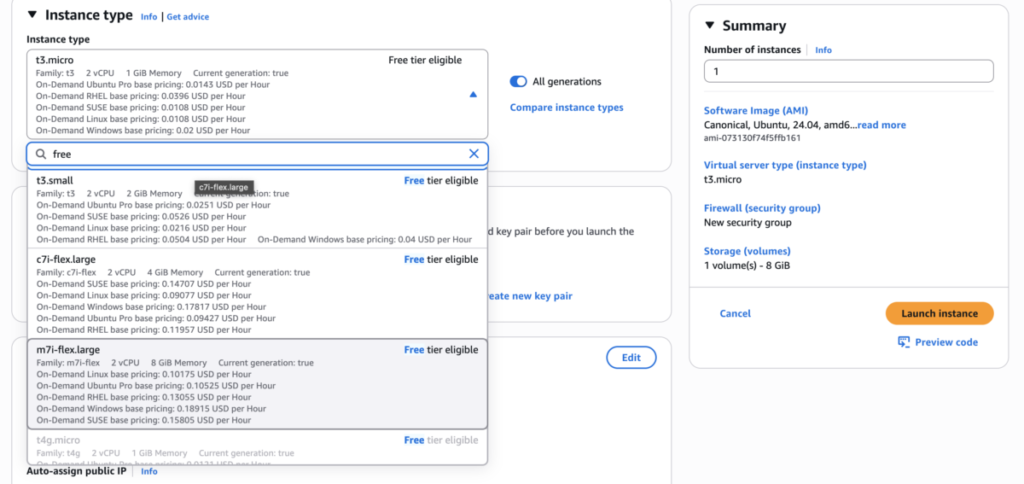
Then click “Launch instance.” And there you goooo!
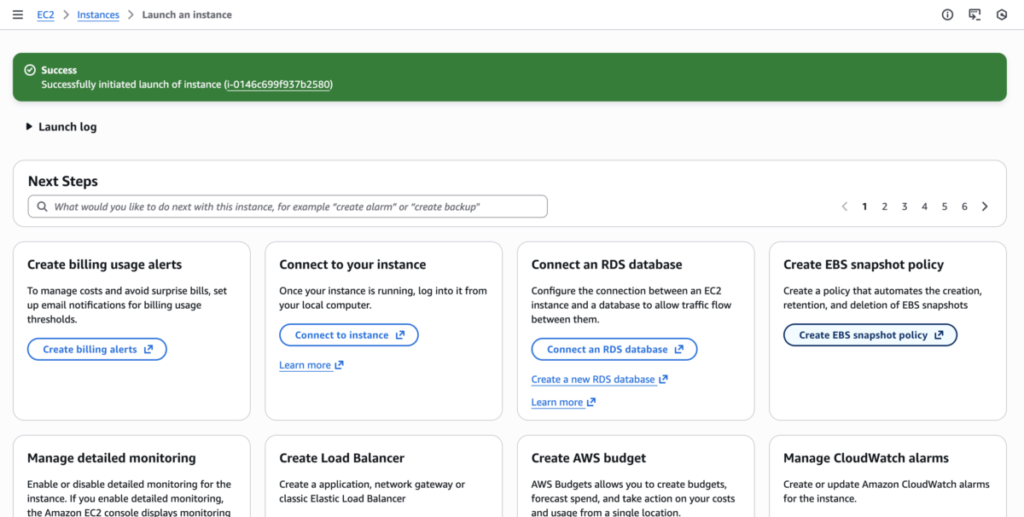
Step 4: Connect to Your Server
Click on the instance ID right below the “Success” message generated above.
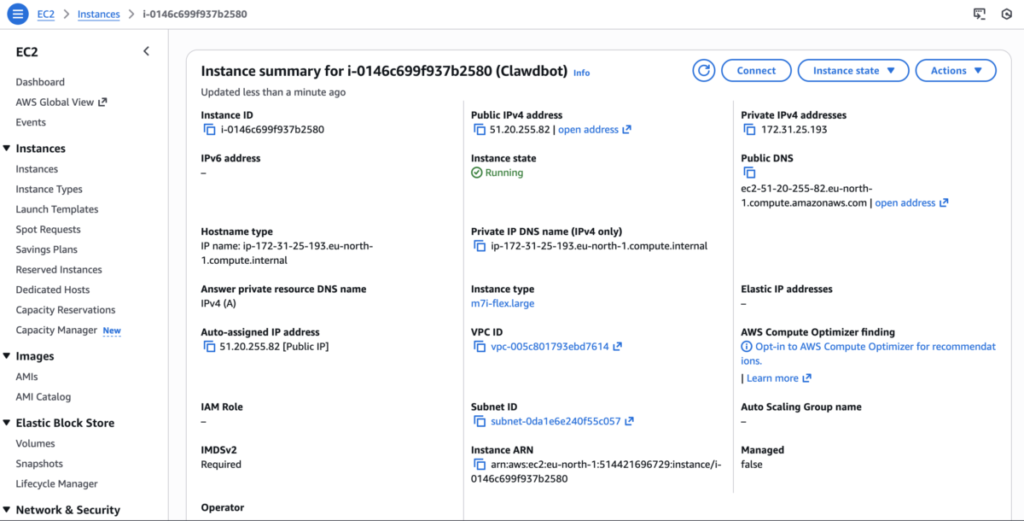
The click the “Connect” button on the top right
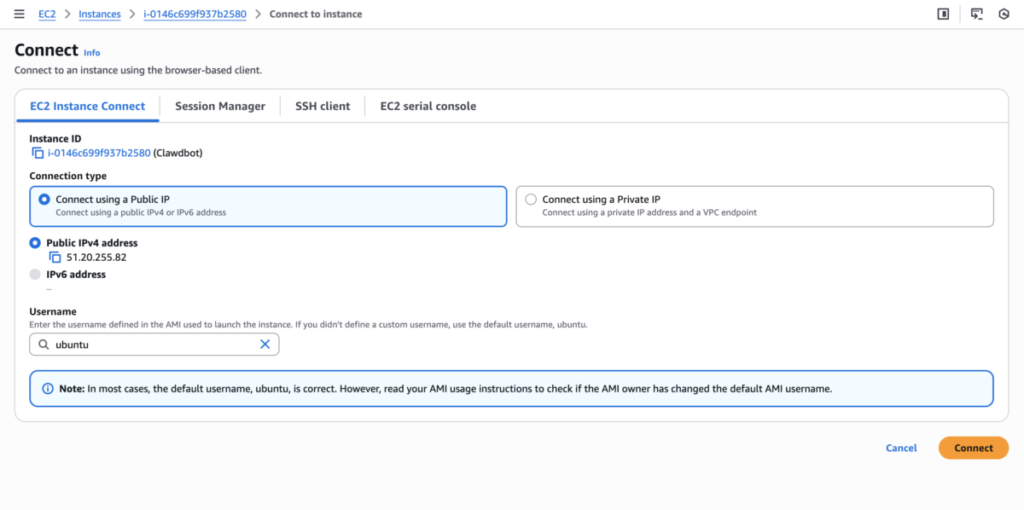
Then “connect” again in the bottom right. And voila! A black terminal window opens. This is your server.
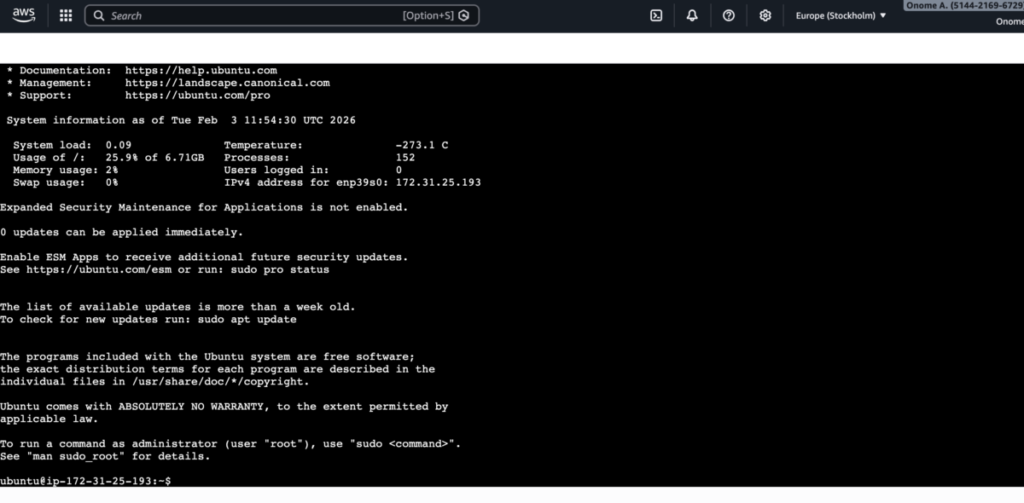
Now we’re inside the terminal for our EC2 instance. Our VPS is all set and we’re doing it for free now.
Step 5: Install Clawdbot
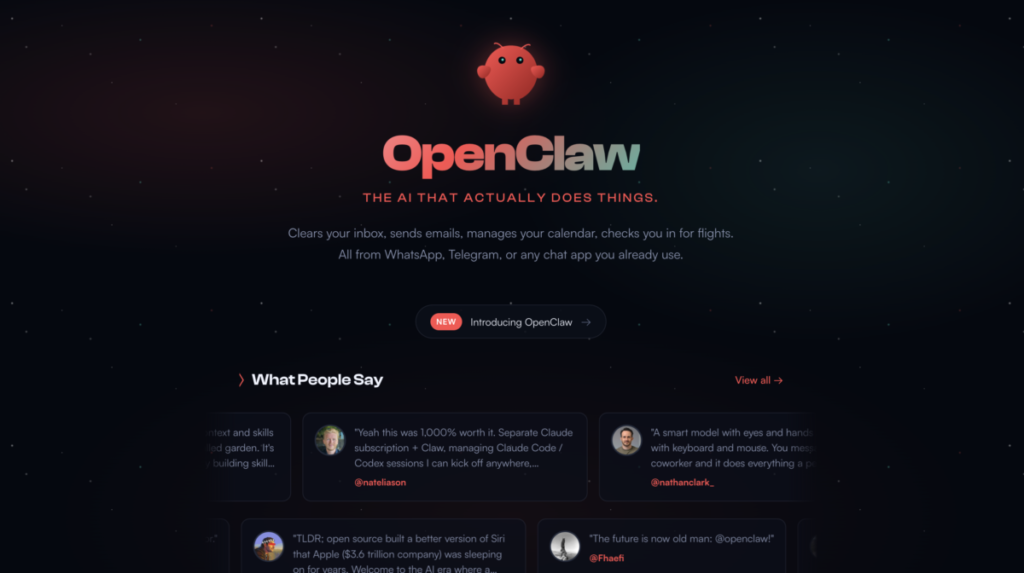
Go to Openclaw.ai
Scroll down to “QuickStart” and copy the command
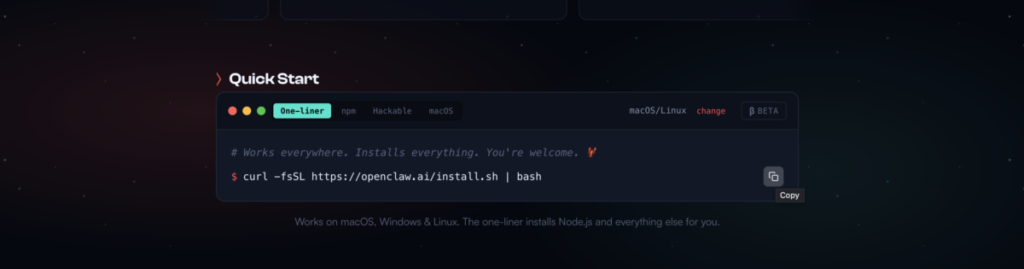
Copy this single line: curl -fsSL https://openclaw.ai/install.sh | bash
Paste it into your terminal and hit Enter.
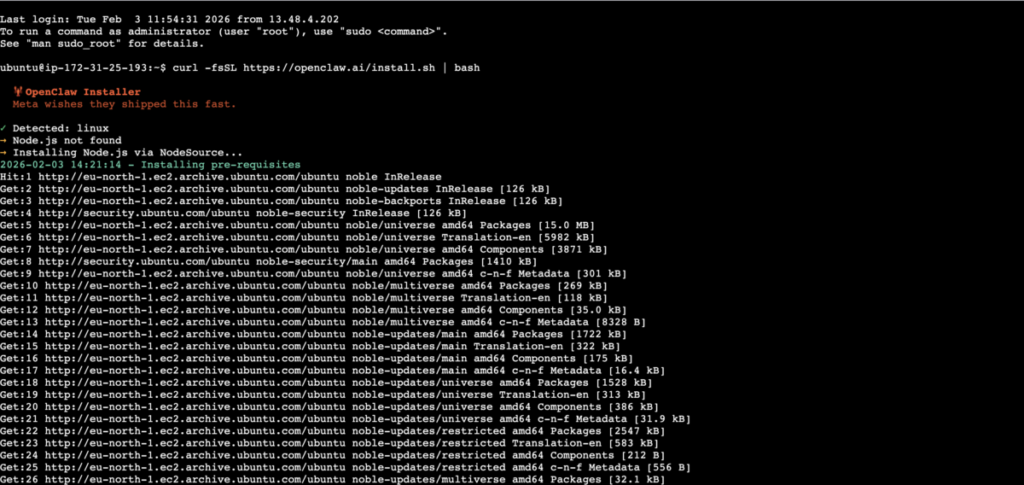
Now sit back and watch. You’ll see a bunch of text scrolling by – that’s totally normal. The installer is:
- Downloading all the necessary files
- Setting up Node.js automatically
- Installing Clawdbot and all its dependencies
This takes about 90 seconds.
Step 6: The Interactive Setup Wizard
Once installation finishes, the setup wizard launches automatically. It’s going to ask you some questions. Let’s walk through each one:
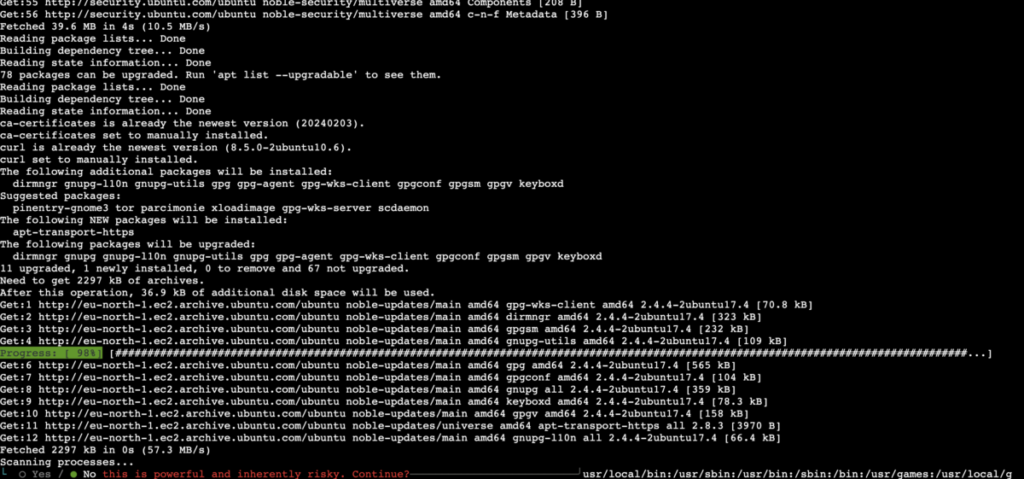
Question 1: “This is powerful and inherently risky. Continue?”
- Type Y and hit Enter
- We’re running this on a VPS, not your main computer, so the risk is minimal
Question 2: “Onboarding mode?”
- Just hit Enter to choose QuickStart
- This uses sensible defaults so you don’t have to configure everything
Question 3: “Which model do you want to use?”
This is where you choose your AI brain. You’ll see options like:
- Anthropic (Claude)
- OpenAI (GPT)
- Google (Gemini)
- Other models
Select Anthropic by pressing Enter. Claude works best with Clawdbot.
Question 4: “How do you want to authenticate?”
You’ll see two options:
- Use Anthropic token (if you have Claude Max subscription – recommended)
- Use API key (if you’re paying per use)
If you have Claude Max, choose “Use Anthropic token”. The wizard gives you instructions:
- It says: “Run
claude setup-tokenin your terminal” - Open a NEW terminal on YOUR computer (not the AWS one)
- Mac: Press Command + Space, type “Terminal”
- Windows: Hit Windows key, type “Terminal”
- Paste this command:
claude setup-token - Hit Enter, it opens a browser window
- Click “Authorize” on the Claude website
- Copy the token that appears in your terminal
- Go back to the AWS terminal and paste the token
- Hit Enter
Question 5: “Which model do you want?”
- Choose Claude Opus 4.5 if you have Claude Max
- Choose Claude Sonnet or Haiku if you’re paying per use (they’re cheaper)
Step 7: Choose Your Messaging Platform
This is how you’ll actually talk to your bot. The wizard asks: “Which channel?”
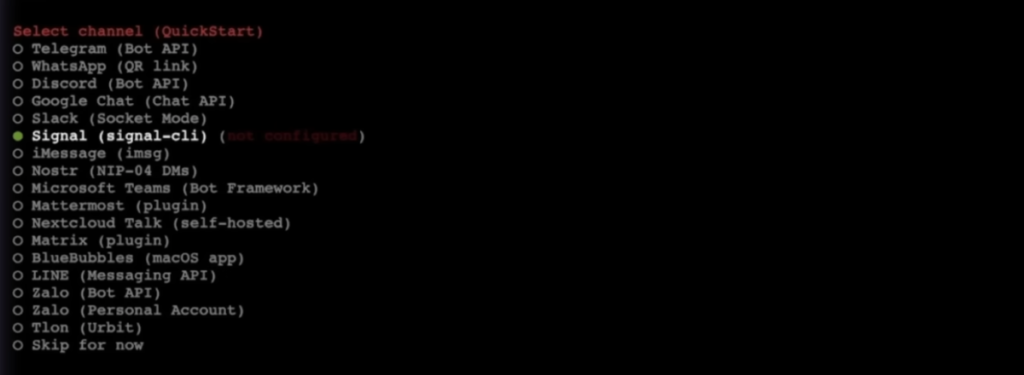
Your options:
- Telegram (easiest to set up)
- Slack (great if you already use it for work)
- WhatsApp (requires phone number)
- Discord (popular with gamers/communities)
- Others: Signal, Google Chat, iMessage
Let’s set up Slack (the video uses Slack, and it’s super clean):
- Select Slack from the list
- It asks for a display name – type “Clawdbot” or whatever you want
- Now it gives you instructions to follow
Step 8: Setting Up Slack (Follow These Exact Steps)
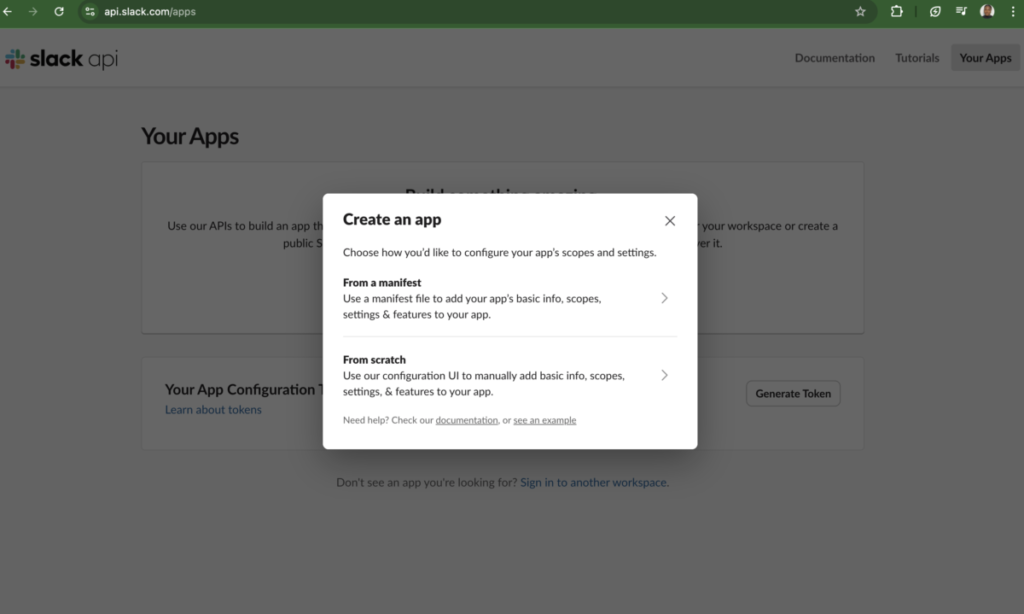
Part A: Create Your Slack Bot
- Open a new browser tab
- Go to api.slack.com/apps
- Click “Create New App”
- Choose “From scratch”
- Name it “Clawdbot”
- Select your workspace
- Click “Create App”
Part B: Enable Socket Mode
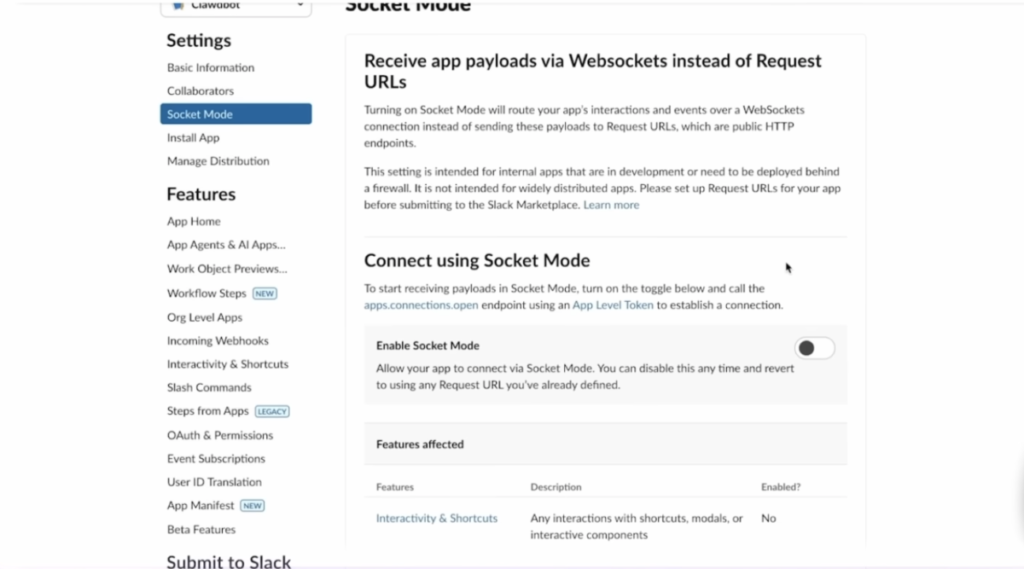
- In the left sidebar, click “Socket Mode”
- Toggle it ON
- For token name, just type “Clawdbot”
- Click “Generate”
- COPY THIS TOKEN and save it somewhere (you’ll need it soon)
- Click “Done”
Part C: Use the Manifest (This Makes Everything Easy)
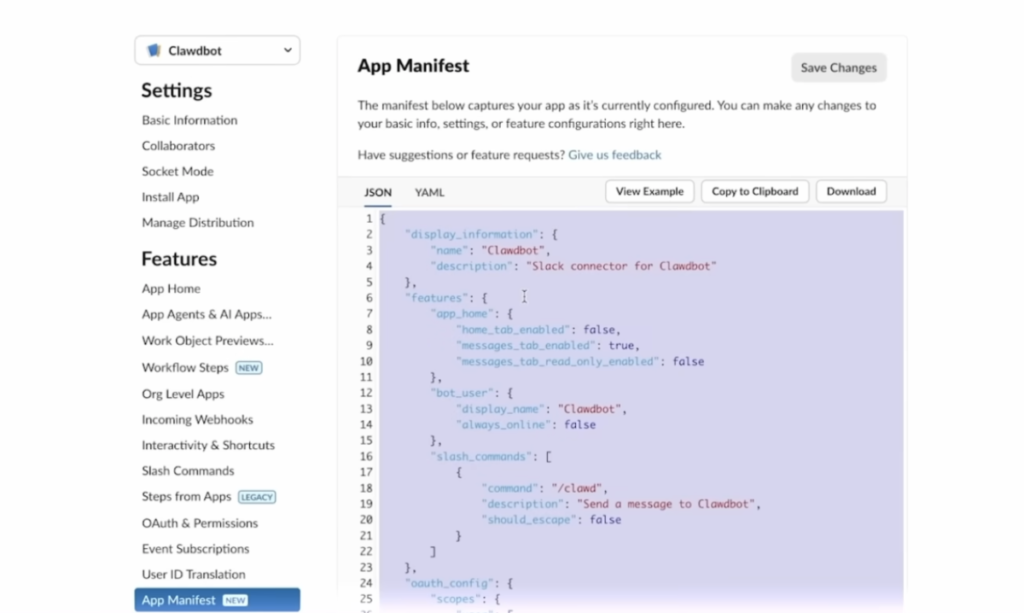
- Scroll down in the left sidebar to “App Manifest”
- Click it
- You’ll see a big text box with JSON code
- Go back to the AWS terminal, there’s a link to the Slack documentation
- Open that doc and find the “Manifest” section
- Copy the entire manifest code
- Go back to Slack API page
- Select ALL the text in the manifest box (Command+A or Ctrl+A)
- Paste the new manifest code
- Click “Save Changes”
Part D: Install the Bot to Your Workspace
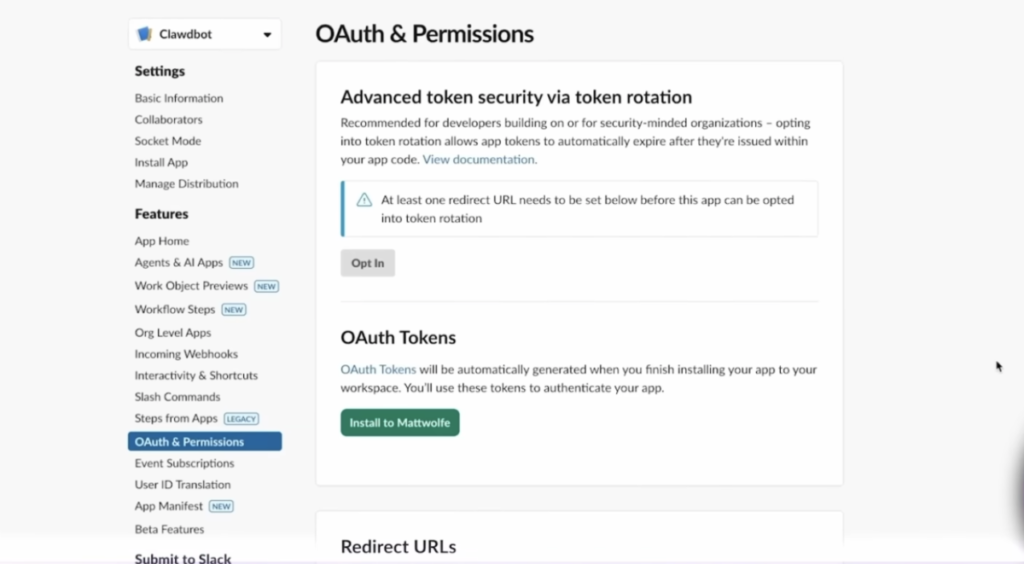
- Click “OAuth & Permissions” in the left sidebar
- Click “Install to Workspace”
- Click “Allow”
- You now have TWO tokens:
- Bot User OAuth Token (starts with xoxb-)
- User OAuth Token (starts with xoxp-)
- Copy BOTH tokens and save them
Part E: Connect Everything Back in the Terminal
Jump back to your AWS terminal:
- It’s asking for “Slack Bot Token”
- Paste the token that starts with xoxb-
- Hit Enter
- Now it asks for “Slack App Token”
- Paste the token that starts with xapp- (the first one you saved)
- Hit Enter
Part F: Create a Private Channel
- Open Slack
- Click the + next to “Channels”
- Create a new channel called “clawdbot-channel” (or whatever you want)
- Make it Private
- Click “Create”
Back in the terminal:
- It asks about channel access, choose “Allow list”
- Type the name of your channel: clawdbot-channel
- Hit Enter
Step 9: Install Skills (Optional But Recommended)
The wizard asks: “Do you want to install skills?”
Type Y and hit Enter.
You’ll see a HUGE list of skills. Use your spacebar to select the ones you want:
Recommended Starter Skills:
- ClawHub (search and install more skills later)
- Gemini CLI (alternate AI model)
- Frame extractor (pull frames from videos)
- Summarizer (extract text from URLs and podcasts)
- Whisper (speech to text)
- PDF tools
- RSS watcher
You can add more later, so don’t stress about this. Hit Enter when you’re done selecting.
Step 10: Final Setup Questions
The wizard asks about API keys for various services. For now, just hit N (no) for all of them. You can add these later when you actually need them.
When it asks about installing as a background service, choose Yes. This makes your bot start automatically if your server restarts.
Step 11: Your Bot Is Alive!
After everything finishes, look at your Slack. You should see a message:
“Hey, I just came online and it’s quiet in here. Fresh workspace. No memories yet…”
Your Clawdbot is working!
But there’s one more step. Type this in your Slack channel:
/invite @ClawdbotThis adds the bot to your channel. Now you can actually talk to it!
Method 2: Installing on Your Own Computer (For the Brave)
Maybe you have an old laptop lying around, or you want to use your current machine. Here’s the quick version:
For Mac Users
- Open Terminal (Applications > Utilities > Terminal)
- Install Node.js:
brew install node@22 - Run the installer:
curl -fsSL https://clawd.bot/install.sh | bash - Follow the setup wizard (same questions as the AWS method)
For Windows Users
Windows needs WSL2 (Windows Subsystem for Linux):
- Open PowerShell as Administrator
- Run:
wsl --install -d Ubuntu - Restart your computer
- Open Ubuntu from your Start menu
- Follow the Linux installation steps below
For Linux Users
You’re already in the terminal:
bash
curl -fsSL https://clawd.bot/install.sh | bashThen follow the wizard.
Quick Setup Guides for Other Messaging Apps
Already finished the AWS setup with Slack? Here’s how to add other platforms:
WhatsApp Setup
- During the wizard, choose WhatsApp
- A QR code appears in your terminal
- Open WhatsApp on your phone
- Go to Settings → Linked Devices → Link a Device
- Scan the QR code
- Done!
Consider using a second phone number (via Google Voice or similar) instead of your personal number.
Discord Setup
Discord needs a few extra steps:
- Go to Discord Developer Portal
- Create a new application
- Add a bot to your application
- Copy the bot token
- CRITICAL: Enable “Message Content Intent” in Bot settings (most people forget this!)
- Paste the token into Clawdbot wizard
- Invite your bot to your server using the generated URL
Missing that “Message Content Intent” step causes Error 4014. Don’t skip it!
Telegram Setup (Easiest Option)
- Open Telegram and message @BotFather
- Send
/newbot - Choose a name for your bot
- Copy the token BotFather gives you
- Paste it into the Clawdbot setup wizard
- Get your user ID from @userinfobot
- Enter that ID when asked
- Done!
Telegram is honestly the smoothest experience. No weird configuration, no manifest files, just works.
The Bottom Line
The future of AI isn’t about companies controlling everything. It’s about tools like Clawdbot/OpenClaw that YOU control, that work FOR you, and that respect your privacy.
Your AI assistant is just a few commands away. The question is: are you going to take the leap?
Because on the other side of that 30-minute setup is something genuinely useful. Something that saves hours every week. Something that makes you wonder how you ever lived without it.
So what are you waiting for? Follow these steps to install Clawdbot and start leveraging it!
FAQs
1. How to install Moltbot?
Moltbot is now called OpenClaw. To install it: 1) Create an AWS free tier account, 2) Launch an EC2 instance with Ubuntu and 8GB memory, 3) Connect via EC2 Instance Connect, 4) Run curl -fsSL https://clawd.bot/install.sh | bash, and 5) Follow the setup wizard to connect your messaging app (Slack, Telegram, or WhatsApp).
2. How to install a chatbot?
For OpenClaw/Clawdbot specifically: Sign up for AWS free tier, launch an Ubuntu EC2 instance, connect to the terminal, paste the one-line installation command from clawd.bot, and configure it through the interactive wizard. You’ll need an Anthropic account for Claude API access and a messaging platform like Telegram or Slack.
3. Is Clawdbot free?
Yes, the Clawdbot/OpenClaw software itself is completely free and open-source. However, you’ll pay for: AWS hosting ($0 with free tier for 12 months), and AI API usage (either $200/month for Claude Max unlimited, or pay-per-use API costs starting around $10-30/month for light usage).
4. Is Clawdbot safe?
Clawdbot has significant security risks if not configured properly. It requires full system access to function, making it vulnerable to prompt injection attacks and data exposure. Run it only on dedicated hardware or VPS, never your main computer. Don’t give it access to sensitive accounts initially, enable firewall protection, and follow the official security documentation. It’s currently best for technical users who understand these risks.